The question you will often hear being asked by underwater photographers on a dive trip is “what sort of dive will it be – macro or wide-angle?” The reason for the question is so they can prepare their cameras in advance – particularly if they are using a DSLR, because changing from one set-up to another involves swapping lens & port configurations.
Wide-angle photography basically means you are photographing seascapes or (if you are lucky…) a big creature, which involves using a wide-angle lens behind a special “dome” to capture the scene.
Macro, on the other hand, means you are isolating a part of the underwater environment and capturing it as an image. Usually that means a fish or one of the many other weird & wonderful “critters” that we are sometimes luck enough to encounter.
Underwater photography is a journey, not a destination, and most people start theirs by attempting to photograph fish – I certainly did and twenty odd years later I am still trying very hard… The basic problem is fairly obvious when viewed from the fish’s perspective – the approach of a very large creature, emitting copious amounts of noisy bubbles and poking a shiny device with bright lights at you is pretty intimidating to say the least and highly unlikely to make you want to relax and pose for your photograph to be taken.
How to photograph fish is covered in nearly all of the underwater photography books I have read and there is some great advice, which I will summarize in this article together with my own experience. However, I think the basic problem is that the fish have not read the books and are not aware that all we want to do is take their picture…
Critter photography on the other hand is relatively much easier because the subject matter tends to be static or slow moving, and they are usually convinced that their superb camouflage makes them invisible. They are therefore much easier to photograph – once you have actually found them….
The techniques used for both fish and critter photography are basically the same, but different lenses are used when using a DSLR. Digicam users have the huge advantage in that they can swap lenses underwater to deal with different subject sizes, but the final image cannot match that from a DSLR because of the superior sensor & lenses.
Underwater Macro Photography Equipment
Over the years I have tried various combinations of Nikon film & digital SLR cameras and lenses as I have attempted to master this mysterious black art.
Here is what I am currently using:
Fish Photography: As a general rule, the more water there is between the lens & the subject, the less impact the image has, so a lens with a close focus capability is required.
But fish come in many different sizes therefore, in my opinion the flexibility of a zoom lens is also required. The lens that I have found to provide a very good overall compromise to these requirements is the Sigma 28-70mm 2.8 EX DG because it’s a reasonably priced lens that focuses down to about 13” and is fast & very sharp.
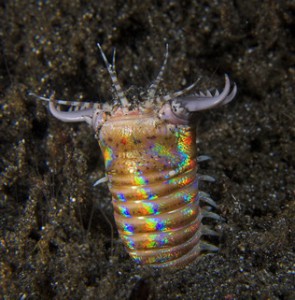
I took this photograph of the hard to find “Bobbit worm” with the 28-70 Sigma on a night dive during a recent trip to the north coast of Bali.
Critter Photography: “Critters” are usually small, sometimes very small indeed, almost always weird & wonderful and often found in the most unusual places where you would least expect them. Again a close focusing capability is required, as is the flexibility to deal with different sizes. I have found that the Nikon 70-180mm macro zoom lens offers great flexibility.
No longer made by Nikon, this lens is much sought after second hand and prices on EBay for them have apparently risen quite dramatically in that last couple of years. The auto-focus technology used in the lens is quite old by today’s standards, so it can be a bit slow to focus in low light conditions, however once it has focused it’s very sharp and produces stunning images.
Whenever I intend to use the 70-180mm lens I always put an additional focusing light on my camera housing, so that if there is not much ambient light I can provide the additional light necessary to assist the auto-focus.
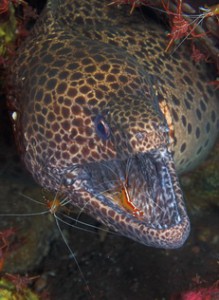
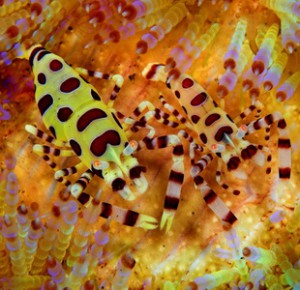
The zoom range of the lens means that you can capture relatively large “fishy” type subjects such as the moray eel being cleaned and tiny critters like the Coleman shrimps on the same dive – if you are lucky enough to encounter them both, as I was at Seraya in Bali:
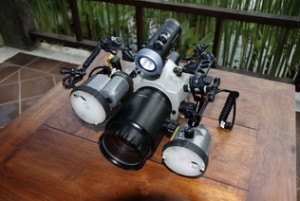
Lighting: Strobes are really the only effective way to show the true coloration of fish & critters. However, it’s how you light the subject that is really important in achieving a great image.
For 90% of the macro photographs I have taken recently I use two of the Inon Z240 strobes mounted close to the port and aimed straight forward as shown in the following image.
With this set-up I am able to quickly change from a horizontal format to a vertical one, depending on the subject, and find that the light from the strobes hits my immediate subject rather than the whole area, creating a pleasing image.
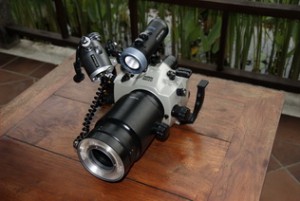
I have been very pleased with the Inon 240 strobes – they are small & light but quite powerful, recycle quickly after being fired and so far have been completely reliable. Set up as shown, the two Inons provide more than enough light and I get almost no backscatter in my images even when the conditions are not the best.
For the other 10% of my macro images, when I am returning to a specific location to photograph a subject I am pretty certain will still be there, I use the ring flash shown in the image.
I first read about ring flashes in Martin Edge’s excellent book “The Underwater Photographer” and eventually purchased mine from the Japanese company Athena. Ring flashes produce very even light and quite specific results, which some people say makes the subject look like it has been somehow lit from inside.
My experience is that for the right subject they produce great results, but you have to be less than 12” from the subject because they are not very powerful.
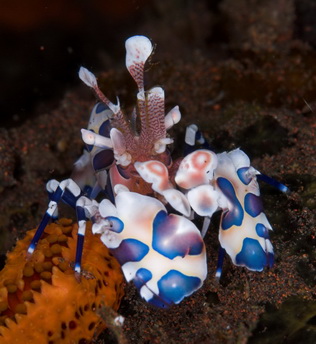
I took the following image of this harlequin shrimp at Seraya in Bali with the ring flash and was impressed with the lighting effect it created.
Here are my basic ground rules for successful macro photography, gleaned from reading many books and making lots of mistakes:
Get Close: The more water there is between your camera & the subject the less impact the finished image will have. So you have to carefully maneuver both yourself and your camera to get as close as you can without scaring away the subject.
Easier said than done, but once you have spotted your potential subject, plan your approach so that you minimize your profile and your noise footprint.
Get Closer: I am not really sure why, but often when I think I have the camera close enough to the subject I realize that I could in fact get closer. This is one of the negatives of using a zoom lens, in that it appears easy to back off and use the zoom to frame the subject.
Remember – get as close as you possibly can and use the zoom to deal with the size of the subject, rather than the other way round.
Be Ready: There is absolutely no point in carefully maneuvering yourself in to position and then start adjusting your camera settings because your intended subject will have fled the scene long before you are finally ready. So make any adjustments before you get in to position.
If you are not sure what your settings should be, practice on something colorful & stationary like some coral or a sponge at the distance you think you will need to be from the intended subject.
It should only take a couple of practice shots to get pretty close to the optimum and then you can make your actual approach with a good chance of success!
Look Up: Probably the most common mistake everybody makes is shooting down on to a subject, which means that it gets lost in the background and lacks the definition & isolation it needs to produce a strong image.
The best images are almost always taken with thecamera below the subject so that it is isolated against a neutral background, which frames it nicely, rather than detract from the overall impact.
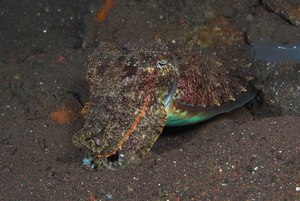
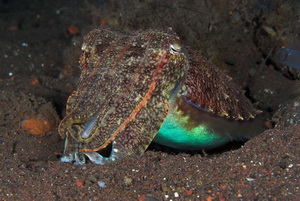
Negative Space: This is the part of the image that is not the main subject, which if we have shot upwards will usually mean the open water.
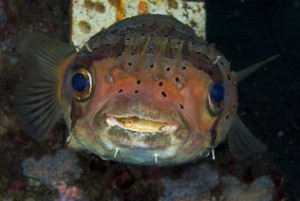
Another very common mistake we all make is concentrating too much on the main subject without thinking about the negative space, such as with this picture of a puffer fish. I find these creatures very difficult to photograph because it’s hard to get them face on, as they seem to know when you are about to press the shutter and turn away at the same time…
I finally managed to get this portrait shot at Ahmed in Bali, but was so preoccupied with getting the puffer’s face that I forgot about what was behind him!
The Eye: The available depth of field (the amount of the image that is actually in focus) is limited with macro lenses, so it’s absolutely critical that the “focal point” of the image is sharp and completely in focus.
The focal point is that part of the image we tend to look at first and with fish & critters it’s invariably the eye (or eyes), which we are drawn to.
The current generation of DSLR cameras has multiple focus zones, which can be individually selected to ensure that the focal point of the image is exactly where you want it to be. I always try to ensure that as I compose the image, one of the focus zones is positioned on the eye.
Settings: To maximize the depth of field it’s essential that a small f-stop is used such as f18 or f22. However this means that a powerful strobe is required to force enough light through the small shutter opening to properly illuminate the subject.
Larger f-stops, such as f5.6 of f8 mean that the shutter opening is bigger and will allow more light through – but at the expense of reduced depth of field.
This is, in my opinion, why powerful strobes need to be used for macro photography rather than the common perception that a small or medium power strobe is all that is required. That may be the case when using a digicam, but not with a DSLR.
I hope this article helps you to improve your macro images and as a final parting shot I thought I should mention the fact that I have been married for 26 years and have two grown-up kids – so I must have mastered that dancing technique eventually!
